

What Syncs Automatically
When you connect your Gmail account, all of these sync with no action required:- All email — inbox, sent, archives, trash, spam. Full history.
- Read/unread status, stars, archive, and trash — bidirectional and ongoing.
- Existing Gmail drafts — imported once, when you first connect.
- Contacts — names and emails from Google Contacts, plus a contact’s own Google-account profile photo when it’s publicly visible.
- Calendar — Google Calendar events sync bidirectionally in real time.
- Signatures — Slashy detects and uses your Gmail signature.
Slashy’s own labels (the AI importance tabs like Important, Newsletter, Billing) are a separate, Slashy-only organizing layer — they sort what’s already in your inbox and don’t create or change labels in Gmail. Drafts don’t sync on an ongoing basis either: a new draft started in Gmail after you’ve connected, or a draft started in Slashy, stays in the client where you made it. Finish a draft in the same place you started it.
What Does NOT Sync
Keyboard Shortcut Mapping
Most Gmail shortcuts work identically. Key differences: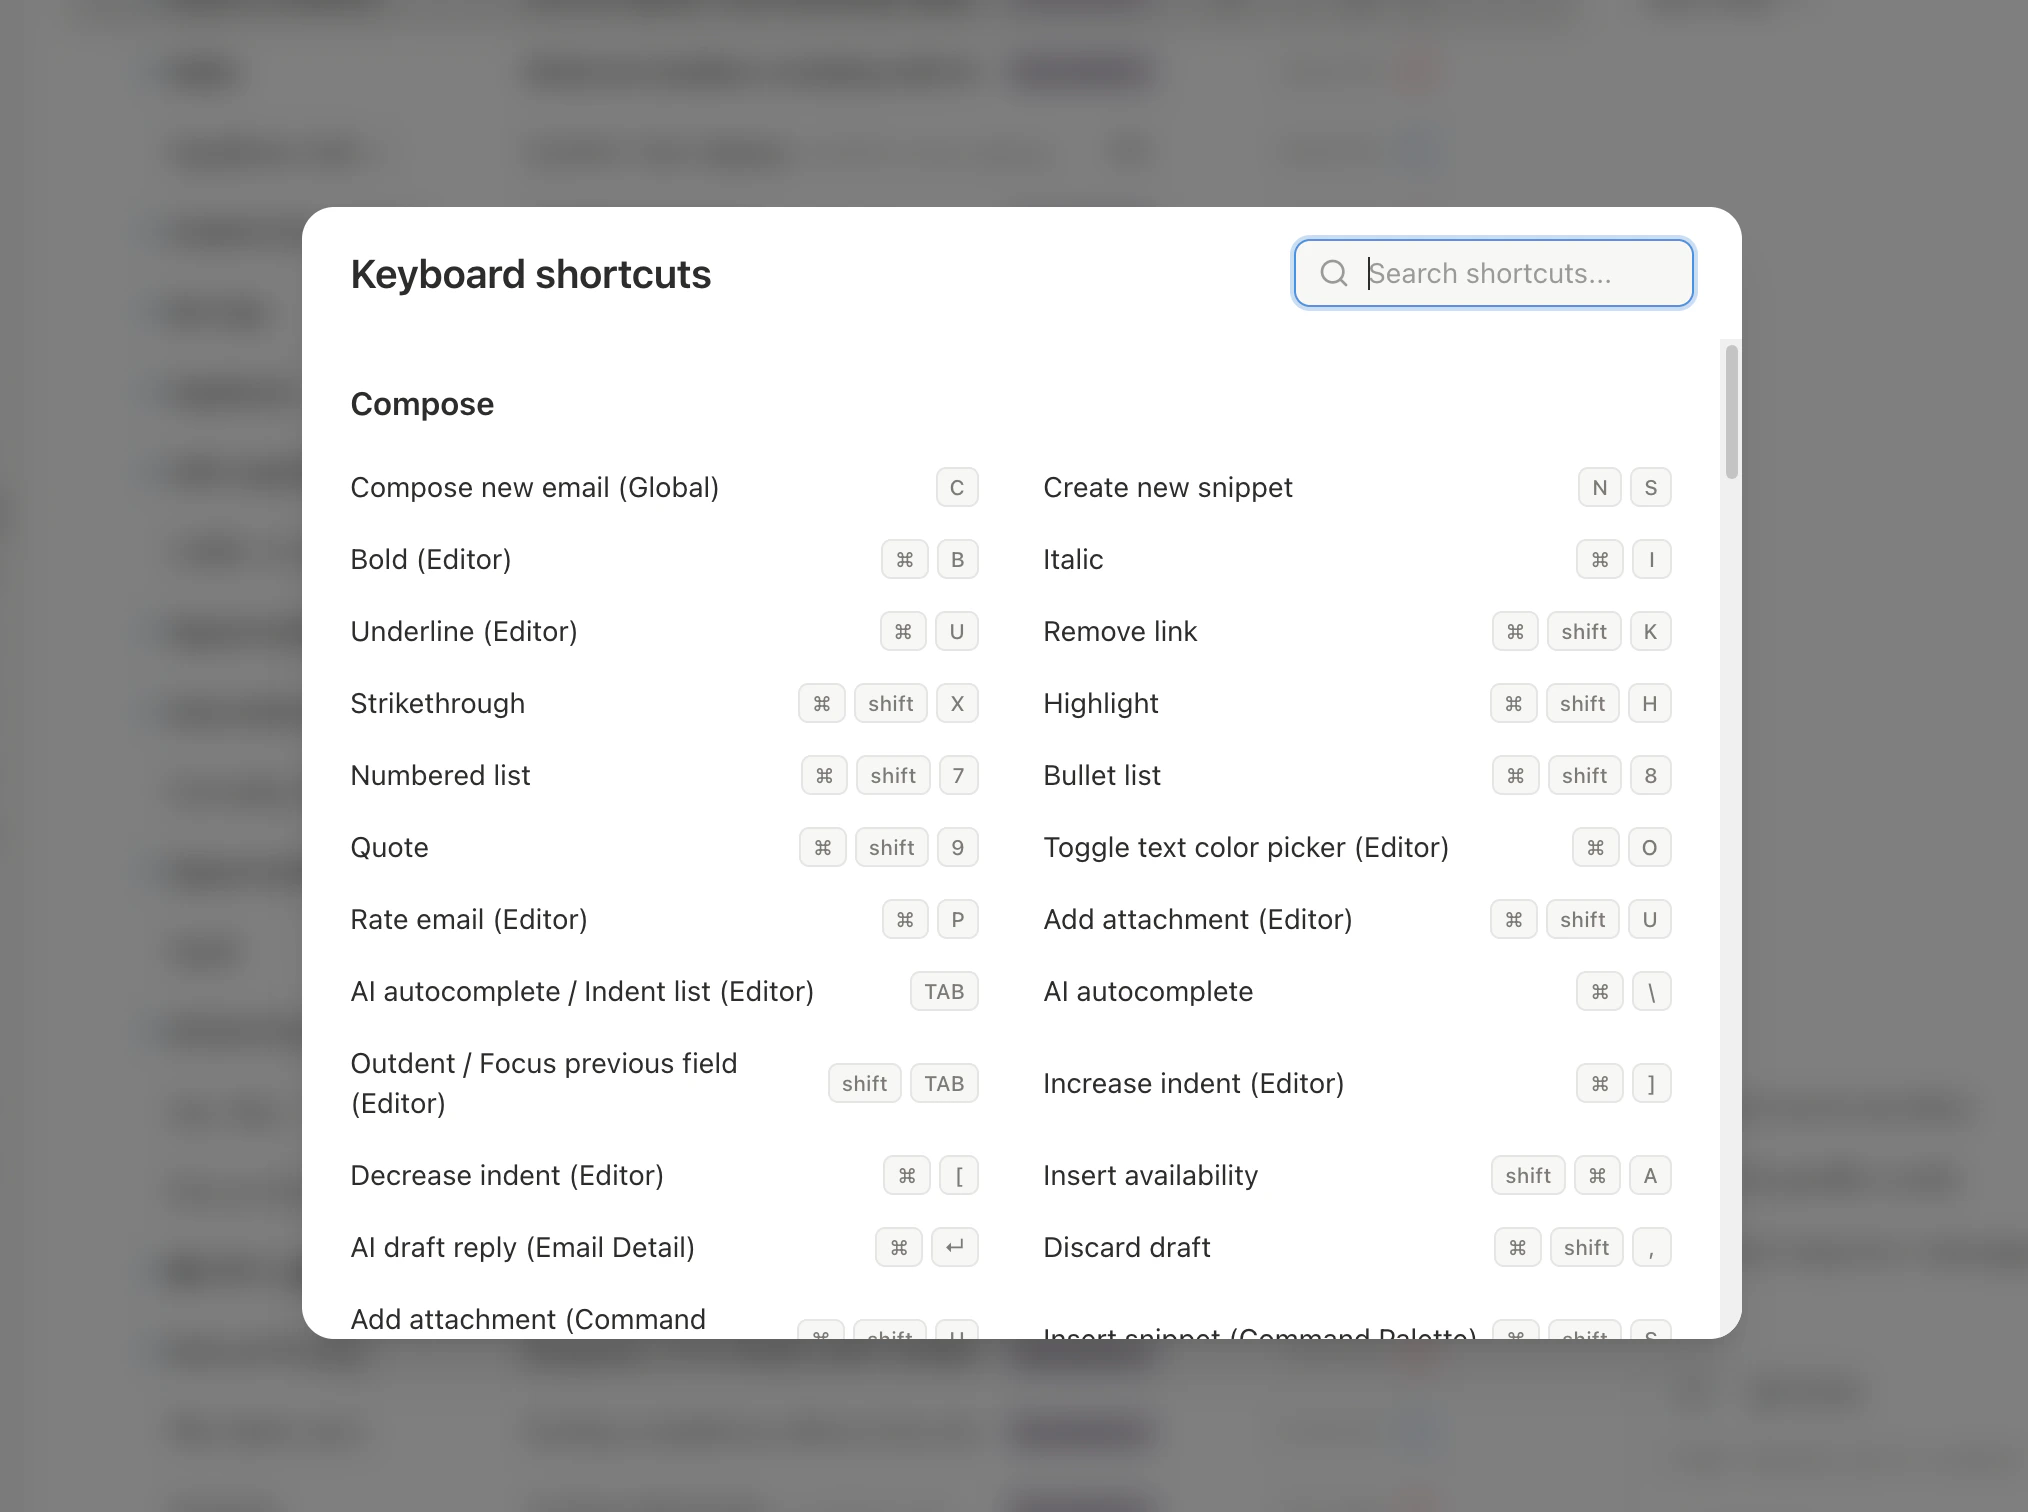
Setting Slashy as Your Primary Client
1
Install
Bookmark the web app or install the desktop app. Download the iOS app for mobile.
2
Notifications
Enable native OS notifications (desktop app) or browser notifications (web app).
3
Configure Labels
Settings > Labels — enable and customize importance labels to replace Gmail’s category tabs.
4
Add Memories
Settings > Memories — add your role, preferences, and communication style so AI drafts are accurate from day one.
Your First 7 Days
Day 1: Connect and configure
Day 1: Connect and configure
- Connect Gmail and wait for initial sync (2-15 minutes)
- Set up importance labels and add 3-5 memories
- Explore shortcuts with
Shift+?
Days 2-3: Use it for all email
Days 2-3: Use it for all email
- Reply using Slashy instead of Gmail
- Try AI Draft Reply (
Cmd+Enter) and edit the result - Use the AI Agent (
Cmd+/) to ask questions about your inbox
Days 4-5: Set up automations
Days 4-5: Set up automations
- Ask the agent for a Daily Dropped Ball Scanner
- Enable auto-reminders for unanswered contacts
- Create a meeting prep automation
Days 6-7: Optimize
Days 6-7: Optimize
- Create Snippets for frequent emails (
n s) - Insert availability in replies (
Shift+Cmd+A) - Use Bulk Unsubscribe in Settings to clean up newsletters
Gmail vs Slashy at a Glance
Migration Checklist
Use this checklist to track your transition:1
Connect your Gmail account
Sign up at slashy.com and connect via Google OAuth. Wait for initial sync (2-15 minutes).
2
Set up importance labels
Go to Settings > Labels and customize your importance categories. These replace Gmail’s Primary/Social/Promotions tabs.
3
Add AI memories
Settings > Memories — add your role, writing style, and preferences so AI drafts are accurate immediately.
4
Install the desktop app
Download from slashy.com/download. Enable OS notifications.
5
Recreate Gmail filters as automations
Open the agent sidebar (
Cmd+/) and describe your old Gmail filters in plain English. The agent creates equivalent automations.6
Create snippets for canned responses
Press
n s to create snippets that replace Gmail canned responses. Slashy snippets support AI variable substitution.7
Disable Gmail notifications
Turn off Gmail desktop/mobile notifications so you only get alerts from Slashy. This avoids double-notifications.
Can I Still Use Gmail?
Yes. Slashy and Gmail share the same backend — switch freely. But using Slashy as your primary client makes the AI smarter. It learns your writing style, patterns, and preferences over time.Your First Week
Day-by-day guide from onboarding to trained AI.
Sync Issues
Troubleshoot email and calendar sync problems.