~/.codex/config.toml.
Setup
1
Open the Codex config file
In your terminal, open the file in your editor:If the file does not exist, create it.
2
Add the Slashy server
Paste this block at the end of the file:Save and exit.
3
Start Codex and approve OAuth
Run 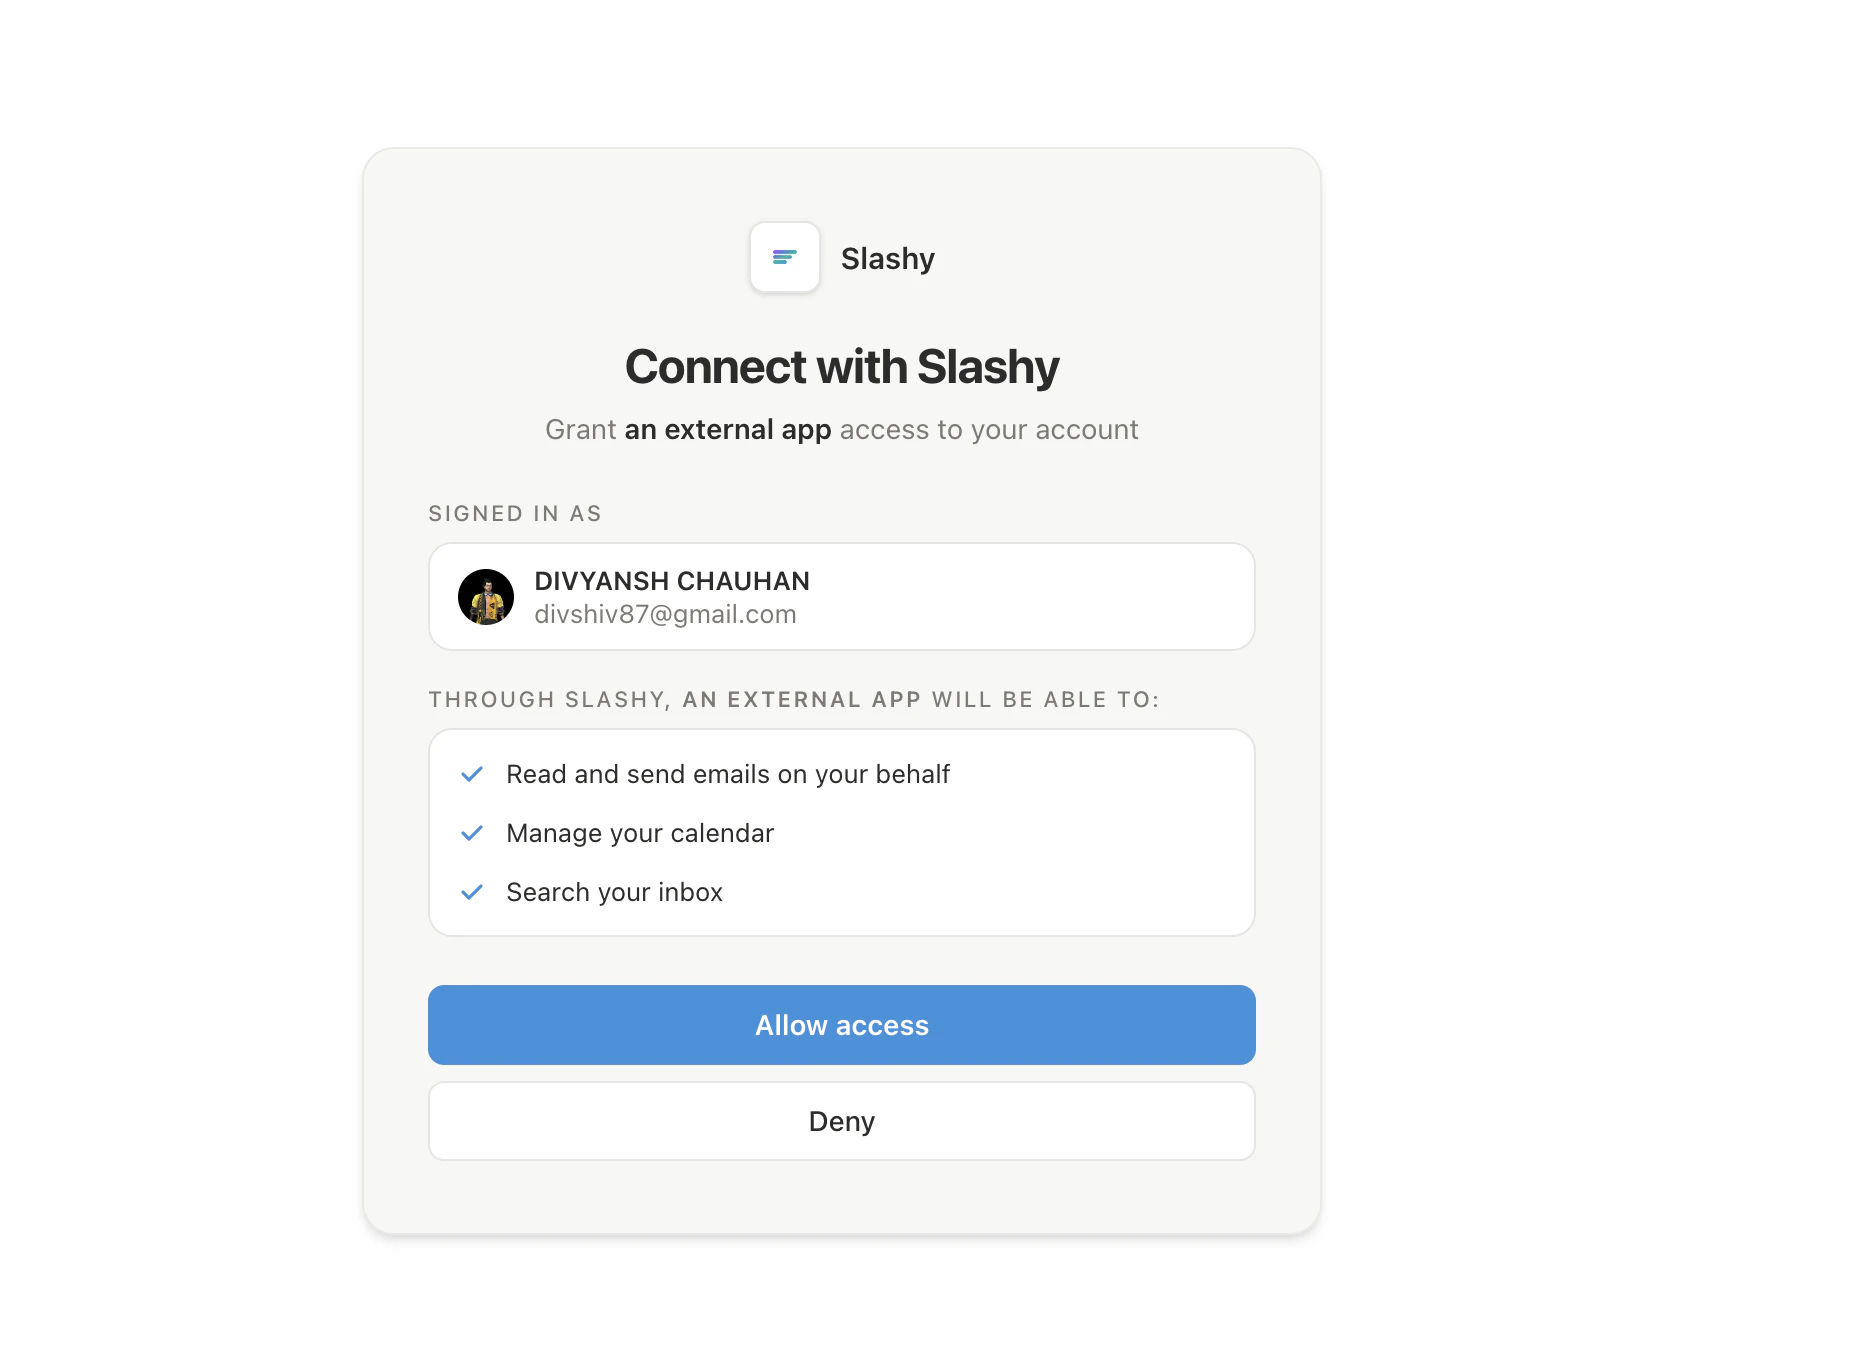
codex in your terminal. On first launch, it opens your browser to the Slashy login page. Sign in with Google and click Allow.4
Verify the connection
Inside Codex, type 
/mcp. You should see slashy listed as connected with its tools visible.What happens after setup
Codex caches the OAuth token in~/.codex/auth/. It refreshes automatically on expiry.
Next steps
Using Slashy MCP
Email prompts for triage, drafting, follow-ups, and scheduling.
Troubleshooting
Fixes for OAuth, missing tools, and wrong accounts.