> ## Documentation Index
> Fetch the complete documentation index at: https://help.slashy.com/llms.txt
> Use this file to discover all available pages before exploring further.
# Claude (web) Setup
> Add Slashy MCP to Claude on the web (claude.ai) as a custom connector.
Claude on the web (**claude.ai**) can use Slashy's tools directly - no desktop app required. Because Slashy MCP is a remote server with OAuth, you add it once as a **custom connector** and cloud-hosted Claude can draft and send email, check your calendar, prep meetings, and research contacts from any browser.
This is the cloud/web version of the [Claude Desktop setup](/how-to-guides/slashy-mcp-claude-desktop). Same server URL, same one-time OAuth login - the only difference is where you add the connector.
## Prerequisites
* A **Slashy account** signed in with Google. [Sign up at slashy.com](https://slashy.com) if you haven't.
* A **claude.ai account**. Custom connectors are available on Free (one connector), Pro, Max, Team, and Enterprise.
* On **Team / Enterprise**, an **Owner** must add the connector for the organization first (see below).
## Setup
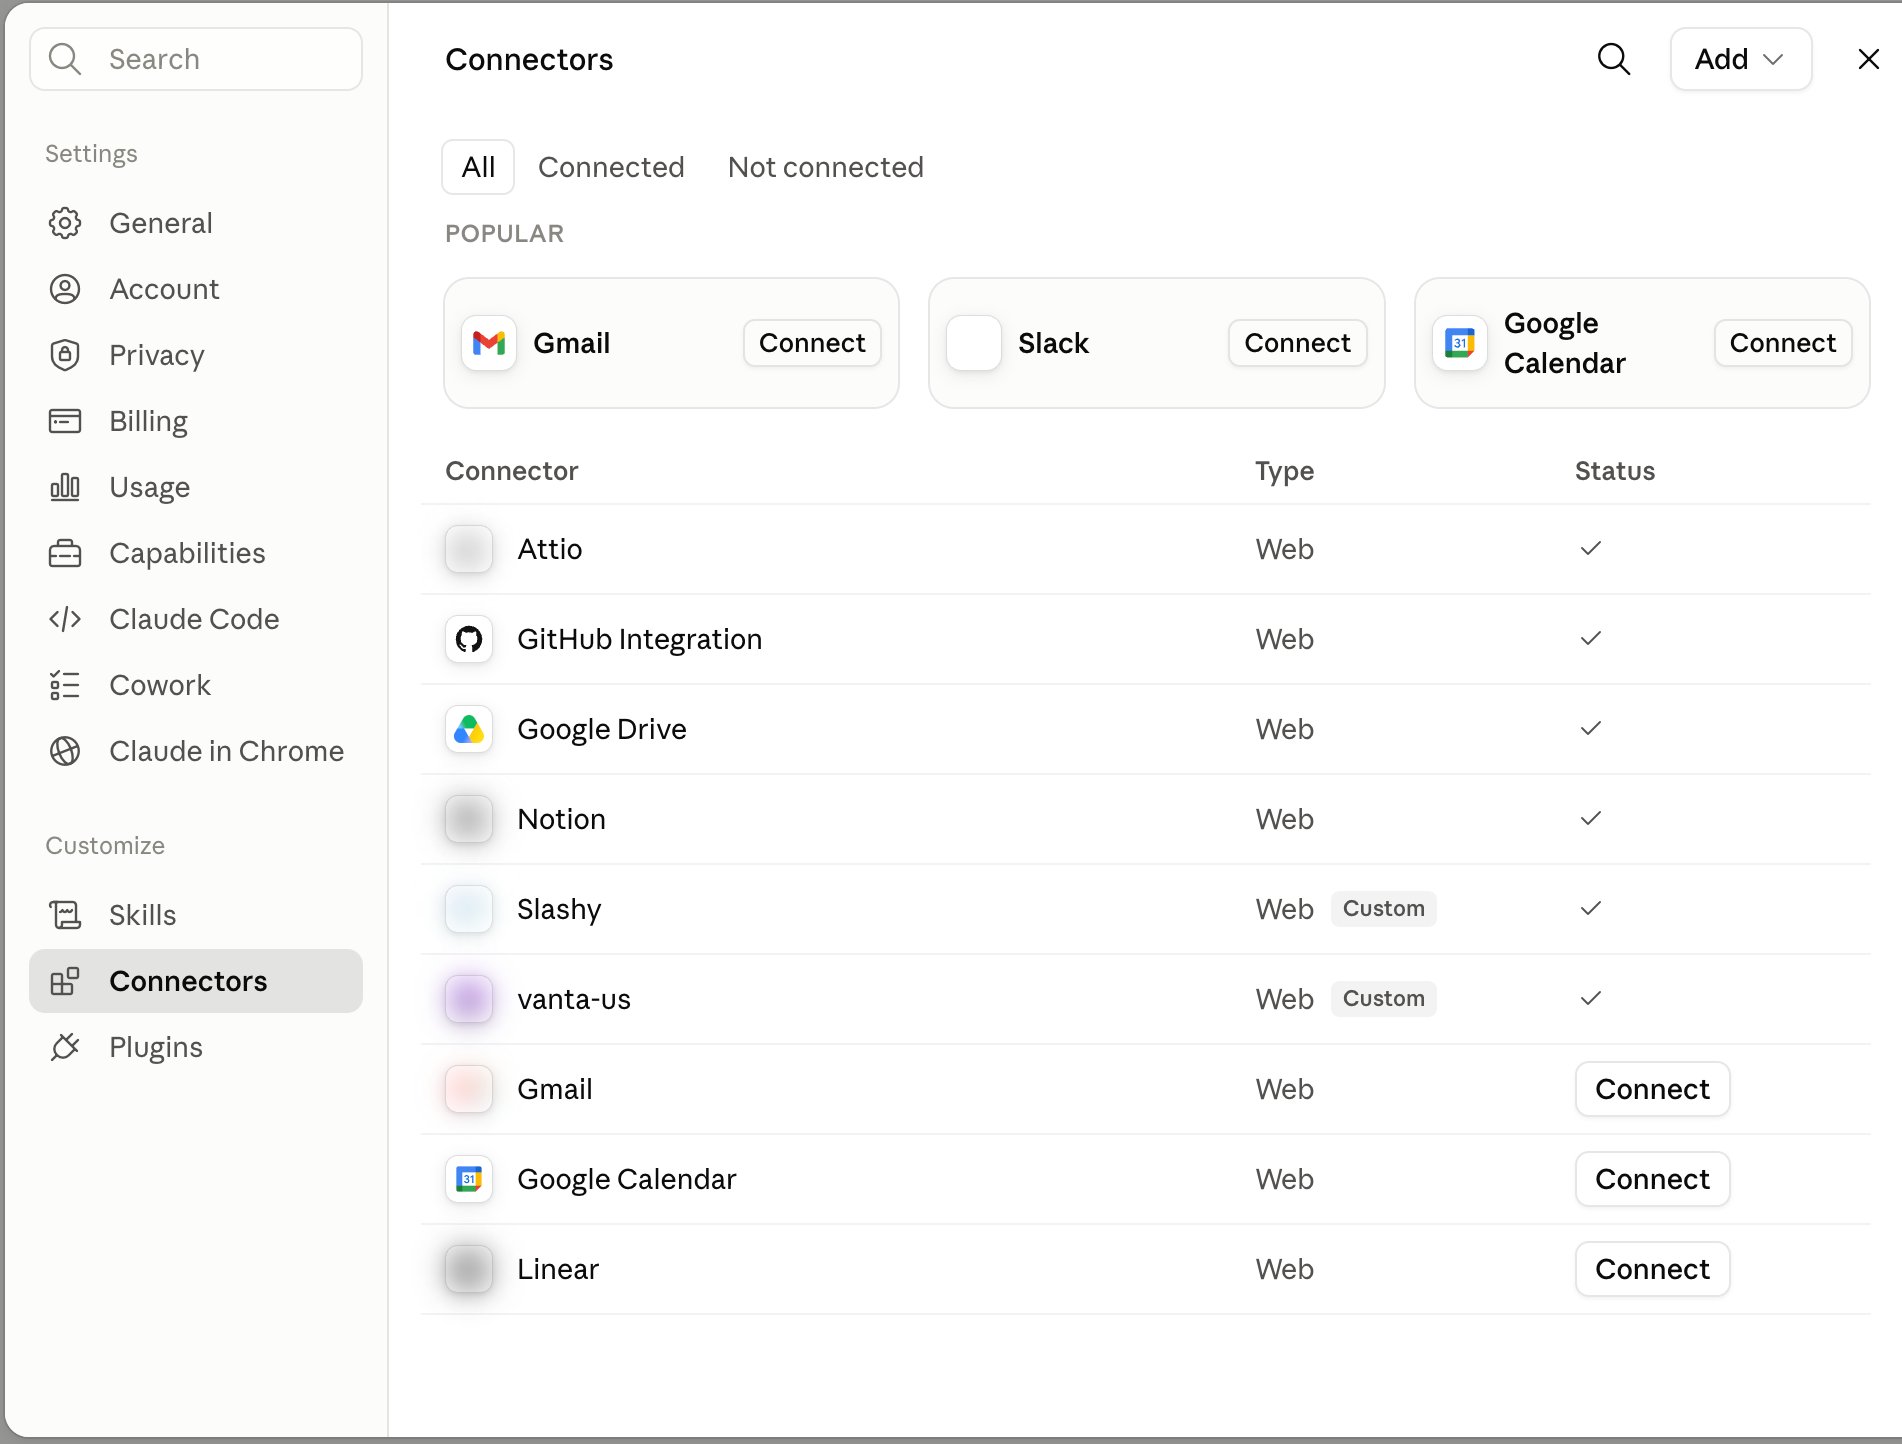
On [claude.ai](https://claude.ai), open **Settings**, then under the **Customize** section click **Connectors**. (On Team/Enterprise, an Owner does this from **Admin settings → Connectors** first - see below.)
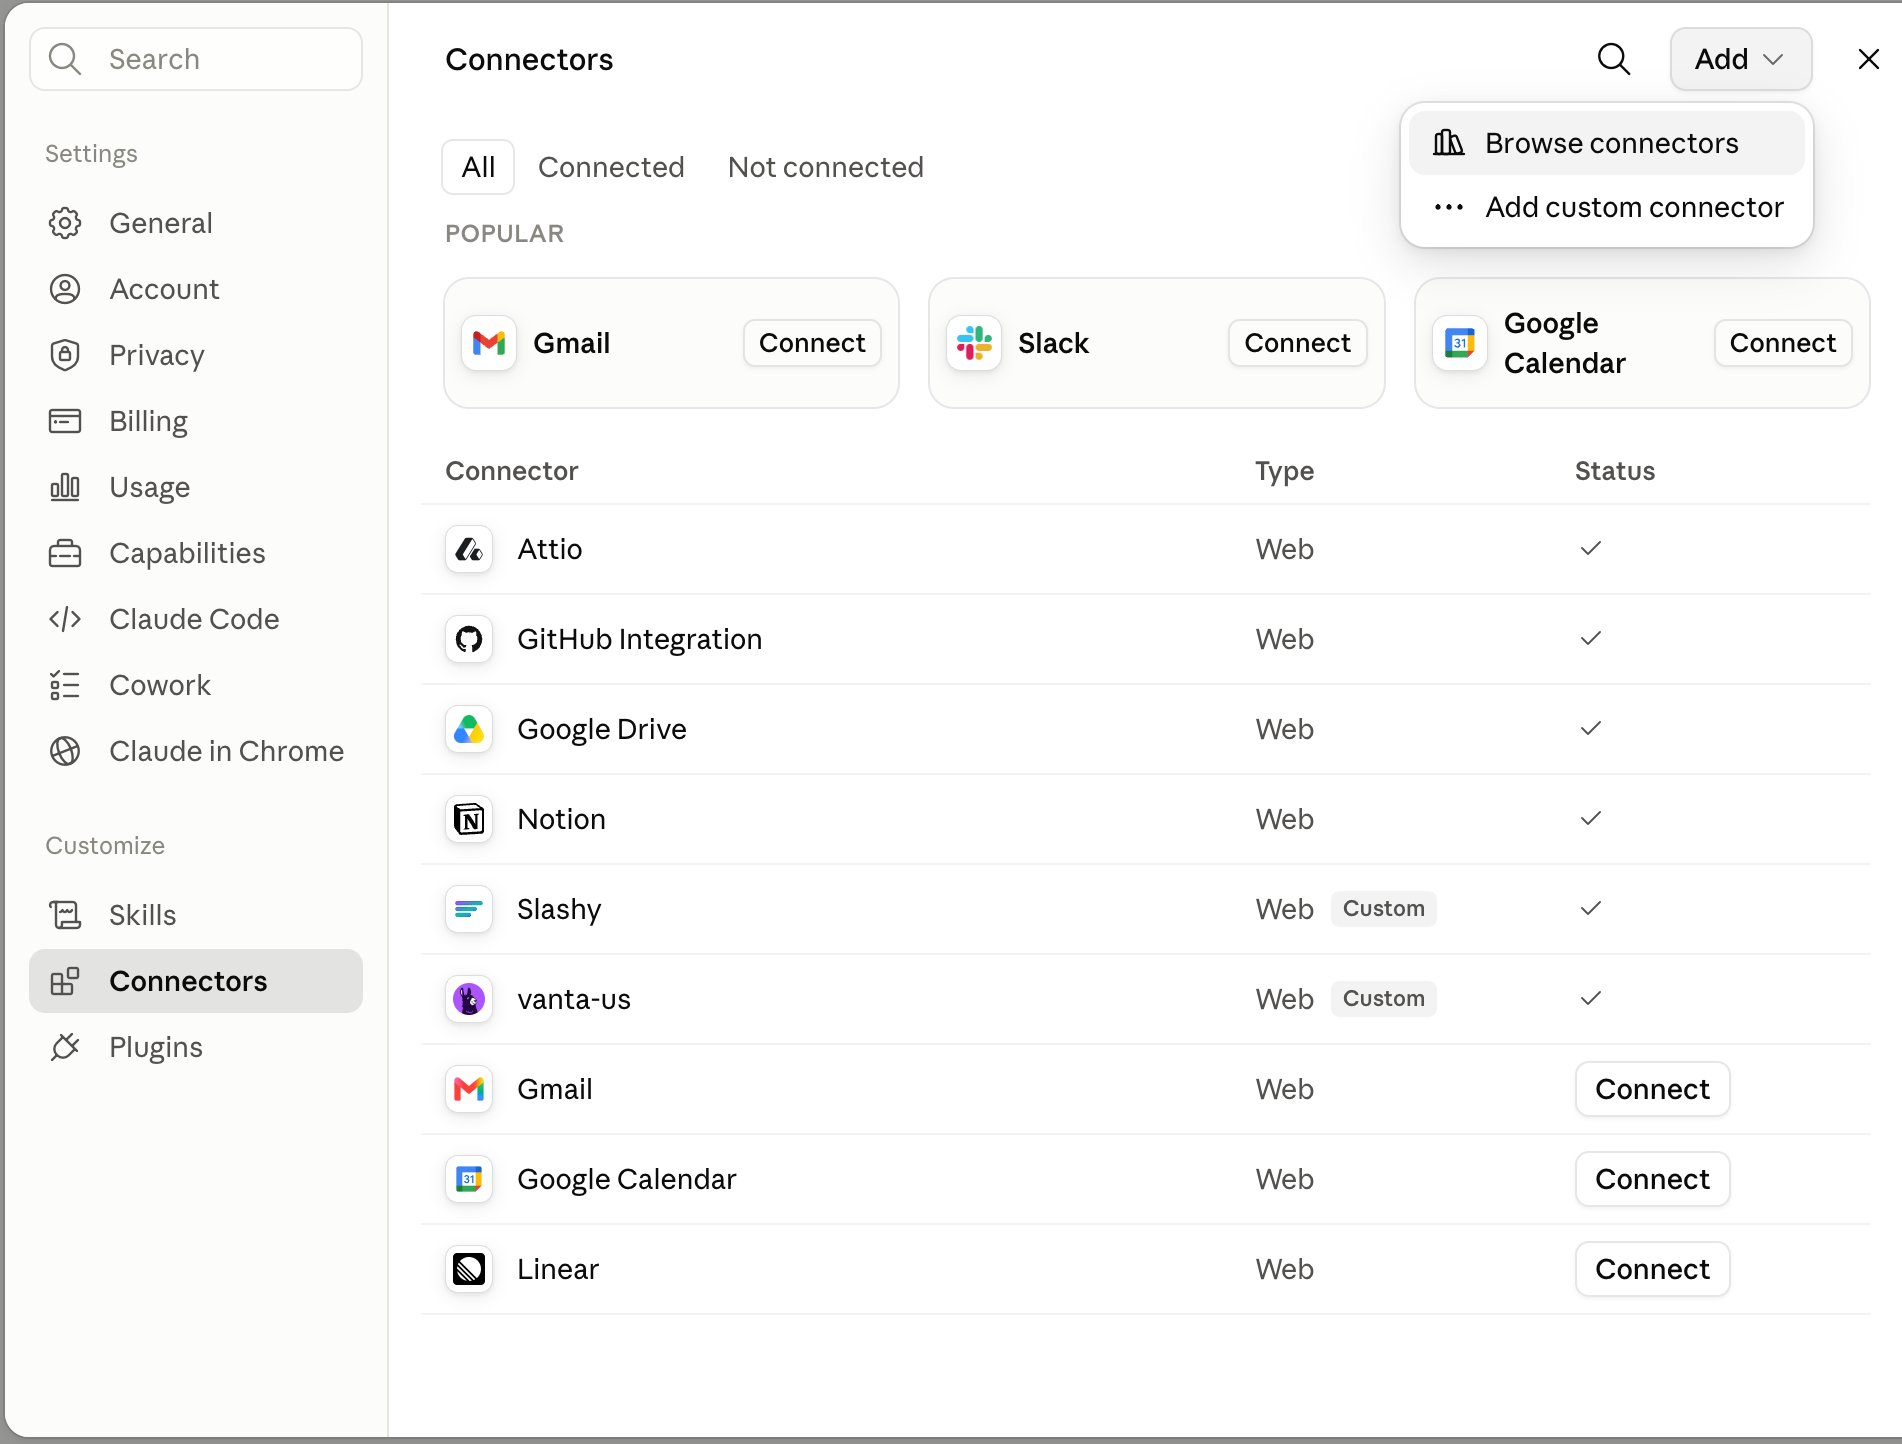
 Click the **Add** dropdown in the top-right corner, then choose **Add custom connector**.
 In the **Add custom connector** dialog, fill in:
* **Name:** `Slashy`
* **Remote MCP server URL:** `https://slashy.ctrlcenter.ai/mcp`
Leave **OAuth Client ID / Secret** blank under *Advanced settings* - Slashy handles OAuth automatically. Click **Add**.
In the **Add custom connector** dialog, fill in:
* **Name:** `Slashy`
* **Remote MCP server URL:** `https://slashy.ctrlcenter.ai/mcp`
Leave **OAuth Client ID / Secret** blank under *Advanced settings* - Slashy handles OAuth automatically. Click **Add**.
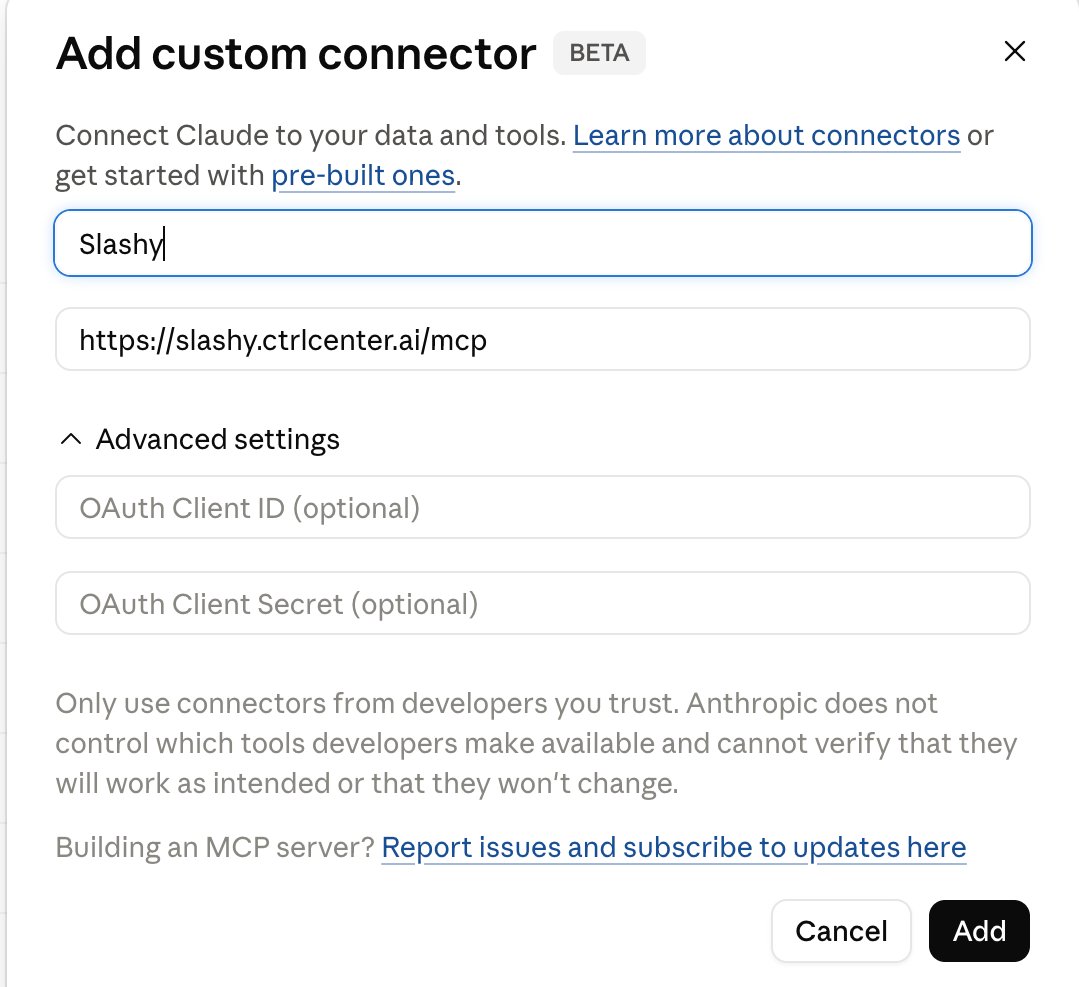 The custom connector dialog is labeled **Beta** by Anthropic. Only the name and URL are required.
Claude opens the Slashy login page. Sign in with Google and click **Allow**. Slashy uses OAuth 2.1 with PKCE - no API keys or static tokens to paste.
Back on the **Connectors** page, Slashy shows in the list with type **Web / Custom** and a checkmark under **Status**. Start a new chat, and ask *"What Slashy tools are available?"* to confirm the tools loaded.
## Team & Enterprise plans
On Team and Enterprise, only **Owners** can add a custom connector at the organization level:
1. An Owner adds Slashy at **Admin settings → Connectors** using the URL above.
2. Each member then goes to their own **Settings → Customize → Connectors**, finds Slashy, and clicks **Connect** to complete their personal OAuth login.
Every member authenticates with their own Slashy account, so tools always act on the right inbox.
## Use Slashy in Claude Code cloud sessions
Once Slashy is connected on your account, it's also available to **Claude Code on the web** (the **Code** tab / cloud sessions at [claude.ai/code](https://claude.ai/code)) - so a cloud agent can send email, prep meetings, or research contacts as part of a task.
Go to the **Code** tab and start a **New session**.
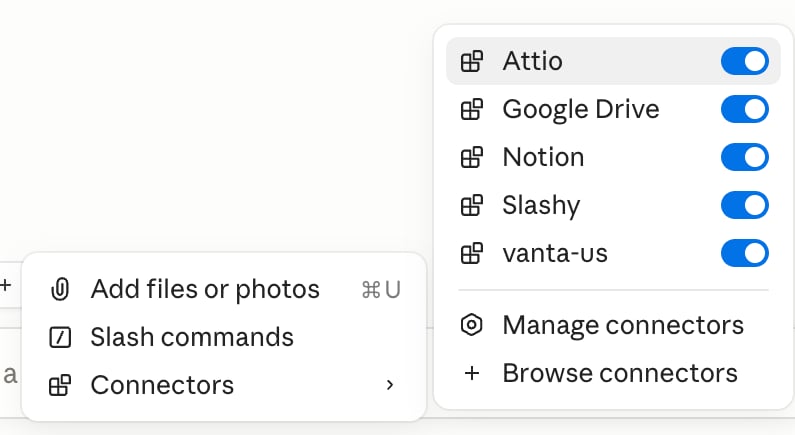
In the composer, click the **+** button, choose **Connectors**, and toggle **Slashy** on. Your account connectors (from Settings → Customize → Connectors) appear here.
The custom connector dialog is labeled **Beta** by Anthropic. Only the name and URL are required.
Claude opens the Slashy login page. Sign in with Google and click **Allow**. Slashy uses OAuth 2.1 with PKCE - no API keys or static tokens to paste.
Back on the **Connectors** page, Slashy shows in the list with type **Web / Custom** and a checkmark under **Status**. Start a new chat, and ask *"What Slashy tools are available?"* to confirm the tools loaded.
## Team & Enterprise plans
On Team and Enterprise, only **Owners** can add a custom connector at the organization level:
1. An Owner adds Slashy at **Admin settings → Connectors** using the URL above.
2. Each member then goes to their own **Settings → Customize → Connectors**, finds Slashy, and clicks **Connect** to complete their personal OAuth login.
Every member authenticates with their own Slashy account, so tools always act on the right inbox.
## Use Slashy in Claude Code cloud sessions
Once Slashy is connected on your account, it's also available to **Claude Code on the web** (the **Code** tab / cloud sessions at [claude.ai/code](https://claude.ai/code)) - so a cloud agent can send email, prep meetings, or research contacts as part of a task.
Go to the **Code** tab and start a **New session**.
In the composer, click the **+** button, choose **Connectors**, and toggle **Slashy** on. Your account connectors (from Settings → Customize → Connectors) appear here.
 ### Recurring / scheduled loops (Routines)
Routines are Claude Code tasks that run on a schedule (or by API / webhook) - unattended, no browser open. Each routine has its **own Connectors picker**, so you choose which connectors its scheduled runs may use.
On the **Code** tab, go to **Routines** and open a routine (or click **+ New routine**).
In the routine's **Connectors** section, tick **Slashy**. Every scheduled run of that routine can then use Slashy's tools.
### Recurring / scheduled loops (Routines)
Routines are Claude Code tasks that run on a schedule (or by API / webhook) - unattended, no browser open. Each routine has its **own Connectors picker**, so you choose which connectors its scheduled runs may use.
On the **Code** tab, go to **Routines** and open a routine (or click **+ New routine**).
In the routine's **Connectors** section, tick **Slashy**. Every scheduled run of that routine can then use Slashy's tools.
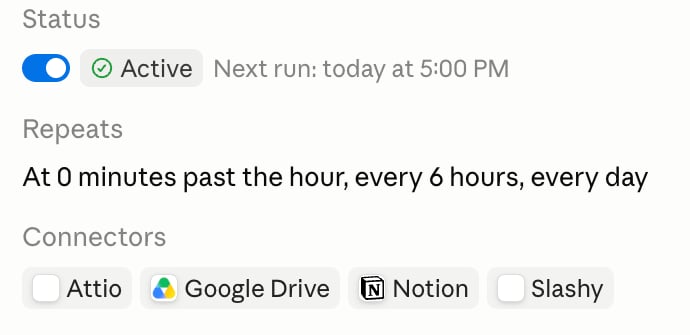 Because you approved OAuth once at the account level, scheduled runs use Slashy without re-prompting - the routine holds the connector selection, and the login persists.
## What works, and where the line is
* **claude.ai chat, Projects, Research:** Slashy tools work in the browser. Claude manages the OAuth token for you.
* **Claude Code cloud sessions (claude.ai/code):** Slashy works - enable it per session via **+ → Connectors**, or per routine via the routine's **Connectors** picker for scheduled/recurring runs (both shown above).
* **Fully programmatic / API cloud agents (Managed Agents):** attaching a remote OAuth MCP server there is a **developer** path - you register the server URL and store credentials in a vault via the Claude API, not through this connector UI. Not needed for the interactive flows above.
## Security
* **OAuth 2.1 with PKCE** - no static tokens; the connector stores only the URL.
* **Scoped to your Slashy account** - tools respect the same permissions as Slashy itself.
* **Revoke any time** - disconnect from your Slashy account settings or remove the connector on claude.ai.
## Next steps
Email prompts for triage, drafting, follow-ups, and scheduling.
Fixes for OAuth, missing tools, and wrong accounts.
Prefer the desktop app? Same connector, visual settings panel.
What Slashy MCP is and how it works.
Because you approved OAuth once at the account level, scheduled runs use Slashy without re-prompting - the routine holds the connector selection, and the login persists.
## What works, and where the line is
* **claude.ai chat, Projects, Research:** Slashy tools work in the browser. Claude manages the OAuth token for you.
* **Claude Code cloud sessions (claude.ai/code):** Slashy works - enable it per session via **+ → Connectors**, or per routine via the routine's **Connectors** picker for scheduled/recurring runs (both shown above).
* **Fully programmatic / API cloud agents (Managed Agents):** attaching a remote OAuth MCP server there is a **developer** path - you register the server URL and store credentials in a vault via the Claude API, not through this connector UI. Not needed for the interactive flows above.
## Security
* **OAuth 2.1 with PKCE** - no static tokens; the connector stores only the URL.
* **Scoped to your Slashy account** - tools respect the same permissions as Slashy itself.
* **Revoke any time** - disconnect from your Slashy account settings or remove the connector on claude.ai.
## Next steps
Email prompts for triage, drafting, follow-ups, and scheduling.
Fixes for OAuth, missing tools, and wrong accounts.
Prefer the desktop app? Same connector, visual settings panel.
What Slashy MCP is and how it works.